What’s Included in the Box?
Guardline provides a comprehensive security solution, allowing pairing of up to sixteen sensors to the receiver – four sensors per designated zone.
Each sensor boasts a unique melody for distinct alert identification, enhancing your awareness of monitored areas.
1.1 Sensor Overview
Guardline sensors are designed for versatile placement and reliable detection. You can connect up to sixteen sensors to a single receiver, effectively dividing your property into four distinct zones, each accommodating four sensors. This allows for pinpoint accuracy in identifying the source of any triggered alert.
Each sensor is individually customizable, enabling you to assign a unique melody to each one. This feature is invaluable for quickly determining the specific location that has been breached. Key components include an adjustment cover, a low-battery indicator, a DC power outlet, and speed/distance sensitivity controls for fine-tuning performance.
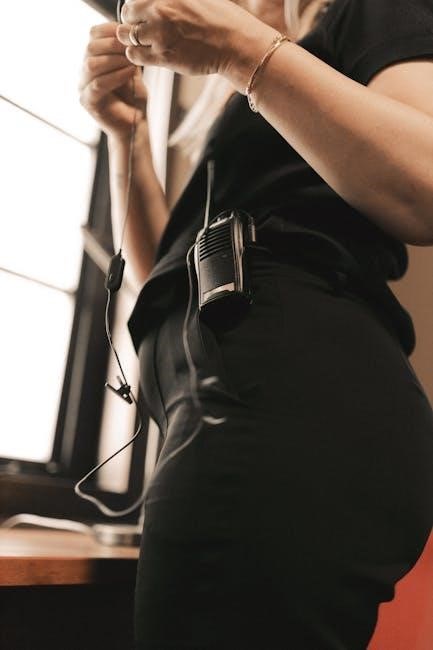
1.2 Receiver Overview
The Guardline receiver serves as the central hub for your security system, capable of receiving signals from up to sixteen sensors, divided across four independent zones. This allows for comprehensive monitoring of a large property with detailed alert localization. The receiver’s intuitive design features clear zone indicators, displaying which area has been triggered.
Each zone can be assigned a unique chime, further enhancing identification capabilities. The receiver is easily powered and offers adjustable volume control. It’s designed for indoor use, providing a reliable and user-friendly interface for managing your driveway and perimeter security.

Getting Started
Begin by ensuring both your receiver and sensor have adequate power before initiating the pairing process for optimal performance and reliable security alerts.
2.1 Powering your Receiver
To power your receiver, locate the DC power outlet on the rear panel. You have the flexibility to operate it using either 4 x AA batteries (not included) or through the provided AC adapter.
If utilizing batteries, ensure correct polarity during installation. For continuous operation and to avoid battery-related interruptions, connecting the AC adapter is highly recommended. The receiver will indicate power status with a corresponding LED indicator.
A stable power supply is crucial for consistent performance and reliable detection of sensor signals, ensuring your security system remains vigilant.
2.2 Powering your Sensor
Each sensor operates on two AA batteries, which are not included with your Guardline system. To install, carefully remove the sensor’s battery cover, typically located on the rear of the unit.
Insert the batteries, observing the correct polarity markings inside the battery compartment. Ensure a snug fit for optimal contact. Once batteries are in place, replace the cover, ensuring it’s securely fastened to maintain weather resistance.
Low battery levels will be indicated by a dedicated LED on the sensor, prompting timely replacement for uninterrupted operation.
2.3 Pairing your Sensor and Receiver
To pair a sensor, begin by powering on both the sensor and the receiver. Press the “Zone” button on the receiver, selecting your desired zone – each zone can accommodate up to four sensors.
Next, press the “Learn” or “Pair” button on the receiver; it will typically enter pairing mode, indicated by a flashing LED. Then, briefly press the test button on the sensor.
The receiver should acknowledge the sensor with a chime or visual confirmation. Repeat this process for each additional sensor you wish to add to that specific zone.
2.4 Installing your Sensor
For optimal performance, mount your sensor approximately 3-6 feet above the ground, facing the area you wish to monitor. Ensure a clear line of sight, free from obstructions like trees or bushes, to maximize detection range.
Utilize the provided mounting bracket and screws for secure attachment to a wall or post. Adjust the ‘Speed Sensitivity’ and ‘Dist’ settings on the sensor to fine-tune its responsiveness based on your environment.
Regularly check the ‘Sensor Low-Battery’ indicator and replace batteries as needed to maintain continuous operation and reliable security coverage.
Adding Additional Units
Expand your security network by seamlessly pairing additional sensors and receivers to the existing system, increasing coverage and protection zones.
3.1 Pairing Additional Sensors and Receivers
To add more sensors or receivers, begin by ensuring the receiver is in pairing mode – consult the receiver overview for specific instructions. Press the zone button you wish to add the sensor to.
Activate pairing mode on the new sensor by removing and replacing the battery, or by using the sensor’s pairing button, if equipped. The receiver will confirm successful pairing with a visual or audible cue. Repeat this process for each additional sensor, assigning them to the desired zones.
Remember, each zone can accommodate up to four sensors. For receivers, follow a similar pairing procedure, ensuring compatibility and avoiding signal interference.
Advanced Settings
Customize your Guardline system with advanced options, including manufacturer default settings, sensor adjustments, and field of view configurations for optimal performance.
4.1 Manufacturer Default Settings
Restoring your Guardline system to its original factory settings can resolve various operational issues or prepare the device for a new setup. This process effectively clears all personalized configurations, including paired sensors, zone assignments, chime selections, and any custom adjustments made to the sensor’s sensitivity or field of view.
To initiate a reset, locate the reset button on the receiver unit – its exact location may vary depending on the model. Press and hold this button for a specified duration, typically around ten to fifteen seconds, until the receiver indicates a successful reset, often through a flashing light or audible tone.
Remember that resetting to default settings will require you to re-pair all sensors and reconfigure your desired settings.
4.2 Sensor Adjustments
Fine-tuning your Guardline sensor’s settings is crucial for optimal performance and minimizing false alarms. The sensor features adjustable settings for both speed sensitivity and detection distance, allowing customization based on your specific environment and monitoring needs.
Speed Sensitivity controls how quickly a moving object must travel to trigger an alert. Lower settings are ideal for detecting slow-moving objects, while higher settings are better suited for faster-moving vehicles or individuals. Detection Distance determines the range at which the sensor will detect motion.
Experiment with these settings to find the perfect balance for your location, ensuring reliable detection without unnecessary alerts.
4.3 Sensor Field of View
Understanding the Guardline sensor’s field of view is essential for effective perimeter monitoring. The sensor utilizes a passive infrared (PIR) technology, detecting motion by sensing changes in heat signatures within its range. This creates a conical detection zone, rather than a focused beam.
Optimal placement considers this conical shape; avoid obstructions like trees or bushes that could block the sensor’s view. The effective range is influenced by environmental factors like temperature and humidity. Adjusting the sensor’s position and sensitivity can maximize coverage and minimize false alarms, ensuring comprehensive security.

Additional Features
Guardline offers convenient features like Pause Mode, a Battery Check function for sensor health, and the ability to connect an external 12v device.
5.1 Pause Mode
Guardline’s Pause Mode is a valuable feature designed to temporarily disable alerts from your sensors, preventing unwanted notifications during routine activities. This is particularly useful if you have pets, frequent visitors, or predictable traffic patterns that might otherwise trigger false alarms.
To activate Pause Mode, simply press and hold the Pause button on the receiver. The system will ignore sensor triggers for a pre-determined duration, typically several minutes. The indicator light will illuminate, confirming Pause Mode is active. Once the timer expires, the system automatically resumes normal operation, restoring full security coverage.
Pause Mode offers a convenient way to customize your security system to fit your lifestyle, minimizing disruptions while maintaining reliable protection.
5.2 Battery Check
Guardline prioritizes reliable performance, and regular battery checks are crucial for maintaining optimal system functionality. Low battery levels in your sensors can lead to reduced range, delayed alerts, or complete sensor failure, compromising your security.
The receiver features a convenient battery check indicator for each paired sensor. This indicator displays the remaining battery life, allowing you to proactively replace batteries before they become depleted. Pay close attention to sensors reporting low battery levels, as timely replacement ensures continuous protection.
Utilize high-quality batteries for extended lifespan and consistent performance. Consistent battery checks are a simple yet effective way to safeguard your property.
5.3 Connecting an External 12v device
Guardline receivers offer the flexibility of connecting an external 12v device, expanding system capabilities for enhanced security applications. This feature allows integration with compatible devices like strobe lights, sirens, or automated gates, providing a more visible and audible alert response.
Before connecting, ensure your chosen device is compatible with a 12v DC power source and has appropriate current draw limitations. The receiver’s 12v output is designed for supplemental devices and should not be overloaded. Carefully review the device specifications to avoid damage or malfunction.
Proper wiring and secure connections are essential for safe and reliable operation.
5.3.1 Unpowered 12v device
When connecting an unpowered 12v device – one that doesn’t have its own power source – to your Guardline receiver, the receiver acts as the sole power supply. This is ideal for devices like simple strobe lights or small sirens designed to operate directly from a 12v DC input.
Ensure the device’s current draw is within the receiver’s output capacity to prevent overload. Connect the device’s positive (+) and negative (-) wires to the corresponding terminals on the receiver. Verify a secure connection before activating the system. The device will only operate when the alarm is triggered.
5.3.2 Powered 12v device
If connecting a powered 12v device – one with its own independent power source – to your Guardline receiver, you’re essentially utilizing the receiver as a trigger. The receiver’s 12v output acts as a relay, signaling the device to activate upon alarm detection.
Connect the receiver’s 12v output to the device’s trigger input. The device will draw power from its own source, unaffected by the receiver’s capacity. This setup is suitable for larger sirens or lights requiring more power than the receiver can provide directly.
5.3.3 Customizing your 12v external device settings
To fine-tune your connected 12v device, consider its activation duration and trigger sensitivity. The Guardline receiver allows for adjustable pulse lengths, controlling how long the 12v output remains active upon sensor detection. Experiment with these settings to match your device’s requirements and prevent unintended activations.
Furthermore, explore the receiver’s zone settings to assign specific sensors to trigger the 12v output. This enables targeted activation, ensuring the device responds only to relevant alerts. Careful customization maximizes the effectiveness of your integrated security system.

Troubleshooting
Guardline offers solutions for common issues, including zone resets, chime adjustments, and resolving conflicts with multiple receivers for optimal performance.
6.1 Resetting the Zones
To reset zones on your Guardline system, begin by ensuring the receiver is powered on and accessible. Locate the zone reset button, typically found on the receiver’s rear panel. Press and hold this button for approximately five seconds, until you observe a visual or audible confirmation – often a flashing light or a beep.
This action clears all previously paired sensors from the selected zone. Subsequently, you’ll need to re-pair each sensor to the zone following the initial pairing procedure outlined in the ‘Getting Started’ section. This ensures accurate zone assignment and reliable alert functionality. Repeat this process for each zone requiring a reset.

6.2 Changing your Chime
Customizing your chime is simple with Guardline. Access the chime selection menu on your receiver unit. This is usually done by pressing and holding the ‘Chime’ or ‘Mode’ button until the receiver enters chime selection mode. Cycle through the available chime options by briefly pressing the same button.
Each press will preview a different chime sound. Once you’ve found your preferred chime, stop pressing the button and allow the receiver to save your selection automatically. This allows for easy identification of which zone is triggered, enhancing your security awareness.
6.3 Multiple Receiver Conflicts
Experiencing interference between multiple Guardline receivers? This can occur if receivers are too close together, causing them to respond to the same sensor signal. To resolve this, ensure sufficient distance – at least 50 feet – between each receiver unit.
Alternatively, utilize the channel selection feature on your receivers. Assign each receiver a unique channel to prevent signal overlap. Consult your receiver’s manual for specific instructions on channel configuration. Proper spacing and channel selection will eliminate conflicts, ensuring reliable operation of your security system.
Accessories
Enhance your Guardline system with additional receivers and sensors, expanding coverage and bolstering security for your property and peace of mind.
7.1 Guardline Extra Receiver for Driveway Alarm
Expanding your security network is simple with an additional Guardline receiver. This allows you to monitor your driveway or property from multiple locations within your home, ensuring you never miss an alert. Each extra receiver connects wirelessly to your existing sensor(s), replicating the signal and providing independent audible and visual notifications.
Perfect for larger homes or those with multiple floors, the extra receiver offers increased peace of mind. It functions identically to the original receiver, offering the same chime selection and volume control. Setup is straightforward, mirroring the initial pairing process, and quickly integrates into your existing Guardline system.
7.2 Guardline Extra Sensor for Driveway Alarm
Enhance your property’s perimeter security with an additional Guardline sensor. You can pair up to sixteen sensors with your receiver, expanding coverage to outbuildings, side gates, or extended driveways. Each sensor operates wirelessly, providing flexible placement options without the need for complex wiring.
Like the original sensor, the extra unit features adjustable sensitivity and a wide detection range; Assign a unique melody to each sensor for easy identification of the alert location. Adding a sensor is a quick process, seamlessly integrating into your existing Guardline system and bolstering your overall security.